How to figure out the right exposure for your images
“How do I get the right exposure” is one of the most asked questions I get almost daily. And today we’re tackling this topic, taking it apart and putting it back together.

We will focus on studio work using artificial light in this article. When I start shooting a set, I always take a few test images where I adjust the exposure and make sure everything looks right. But how do you know what’s the “right” exposure?
For me, it’s right when the skintone of the model looks very close to how it’s looking in real life when I look at it. I’d rather have it a tiny bit darker than too light, because you can always brighten up a photo but darkening it never works as well. When I’m using a white backdrop it never comes out truly white in camera, it’s always a little bit darker. That’s because the model is closer to the light than the backdrop, so it naturally isn’t as well lit as the model in the foreground.
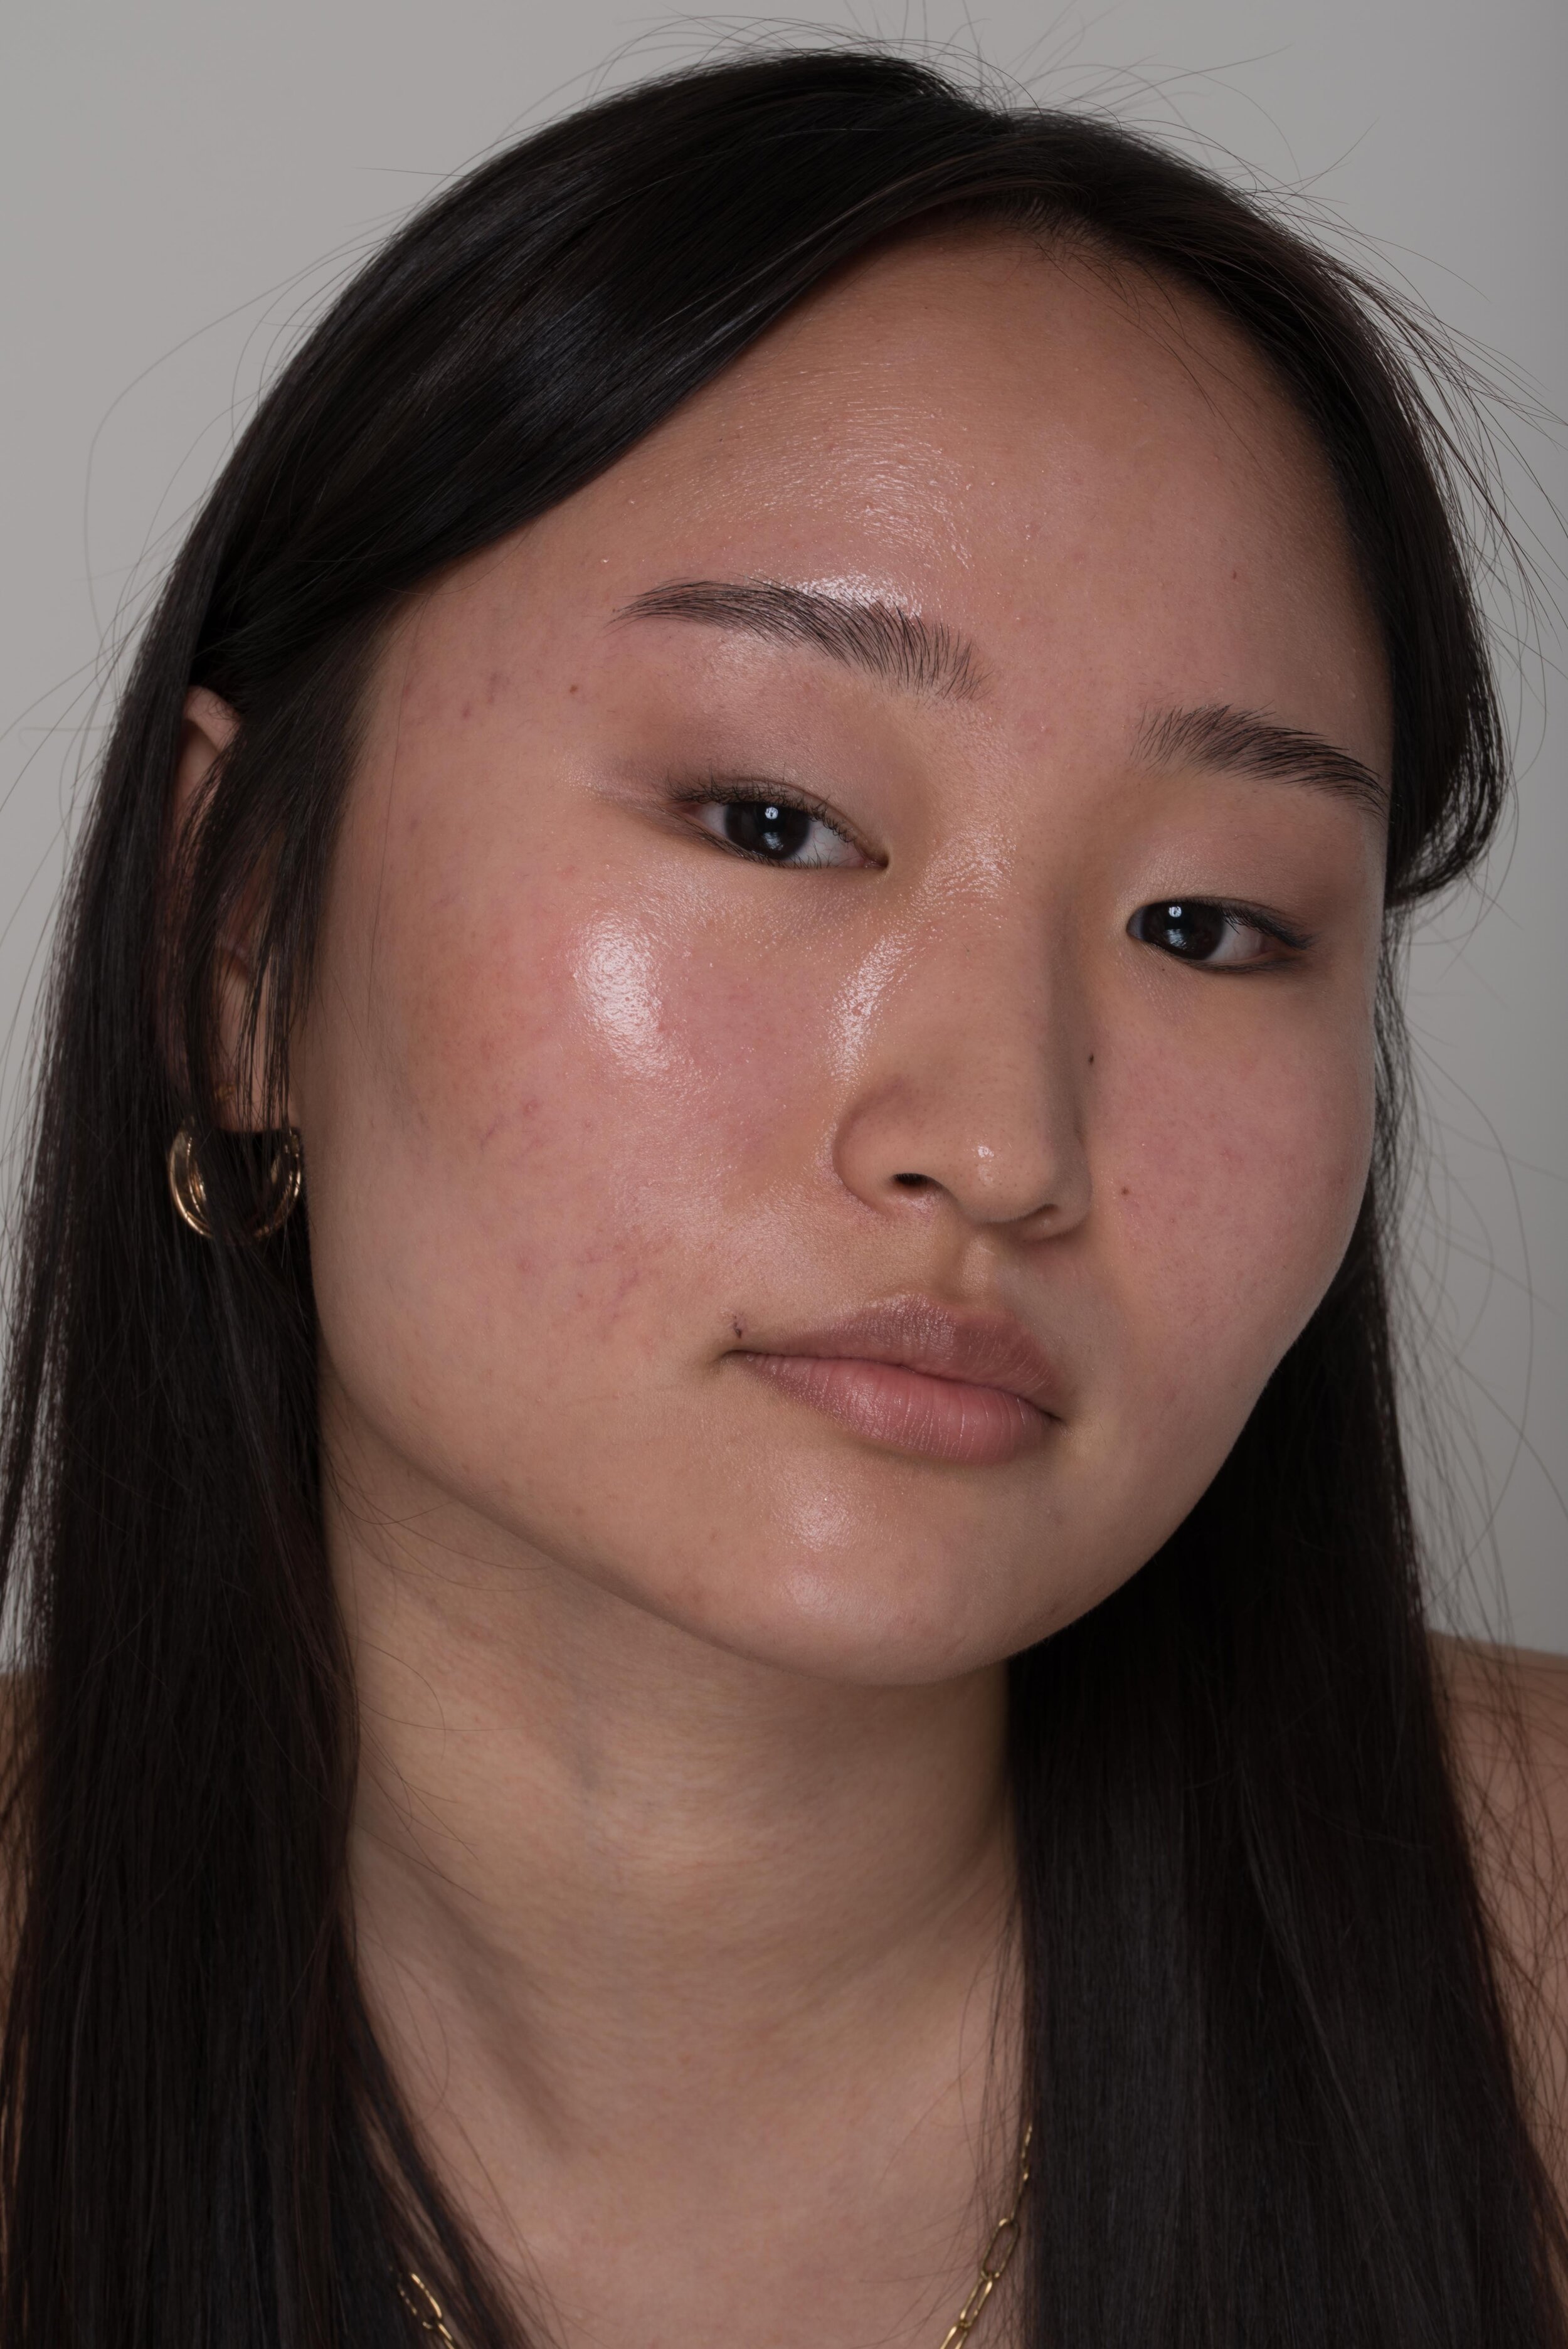
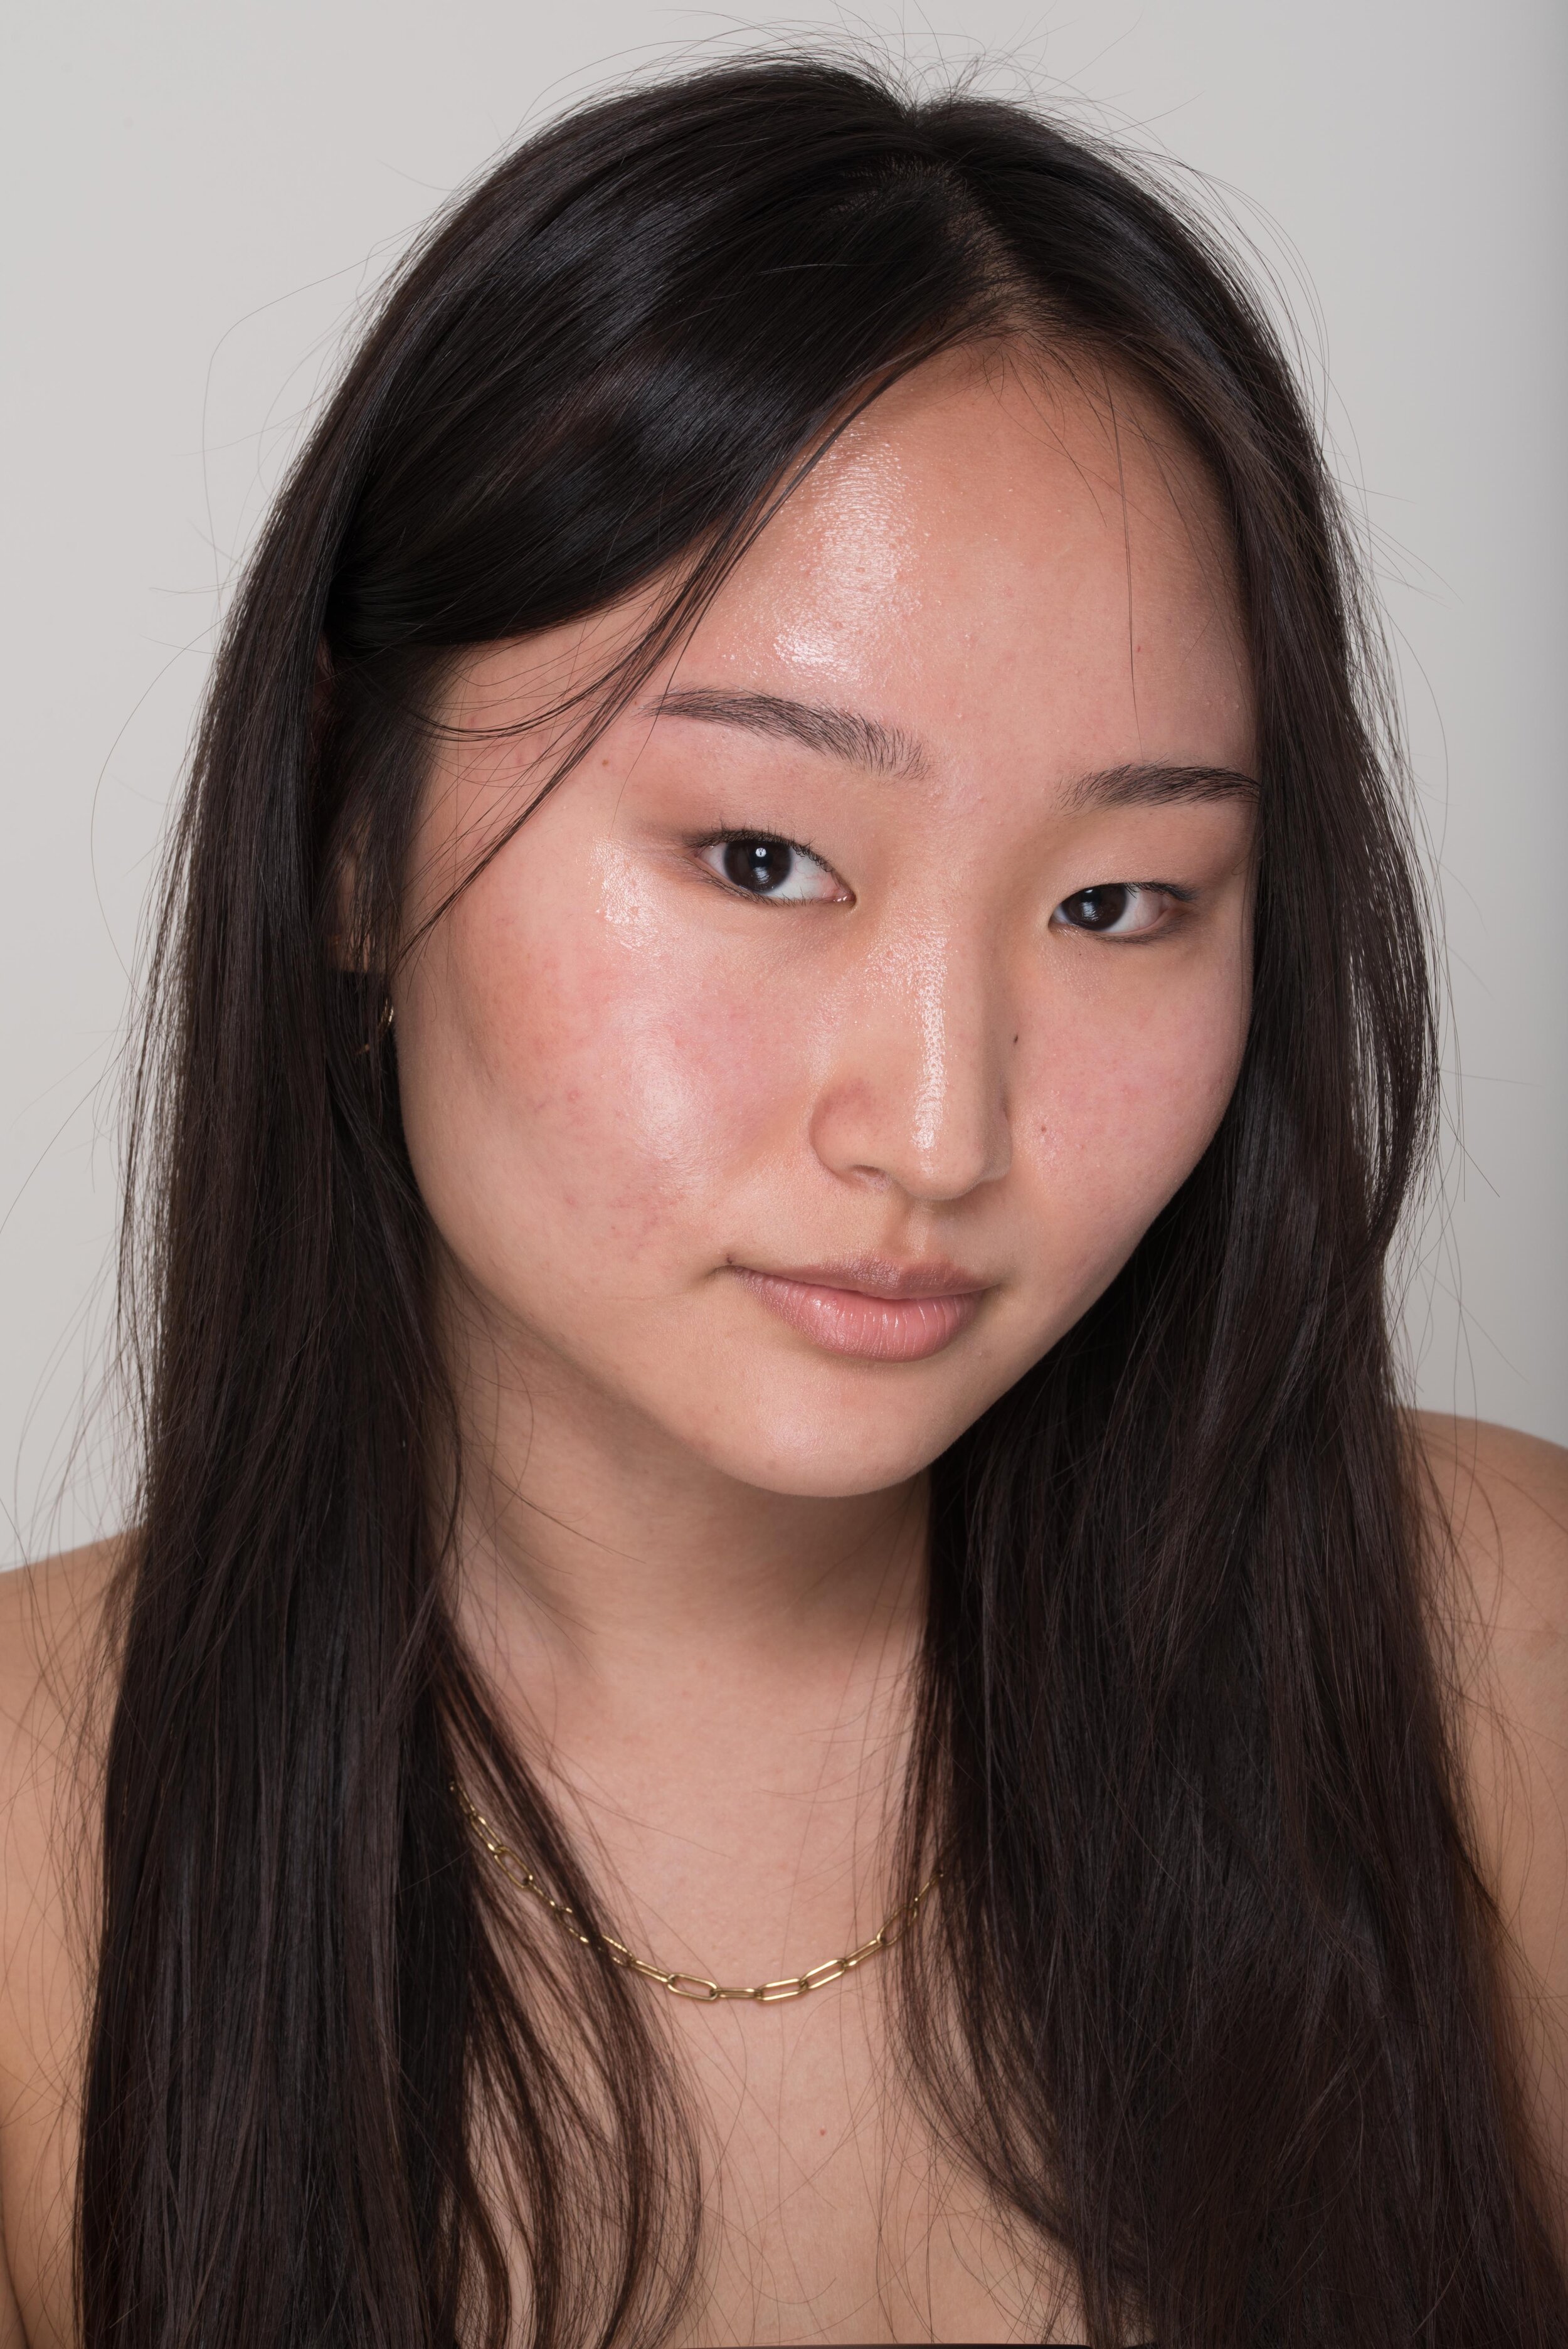
The photo you see in this post is the final, retouched photo. The photo didn’t look like that straight out of camera – always keep that in mind. On social media we tend to compare our work to the work of others. But you need to know what additional work was pot into the photo to even be able to have an actual comparison. So here’s the raw out of camera photo, the color graded photo and the final image for reference:
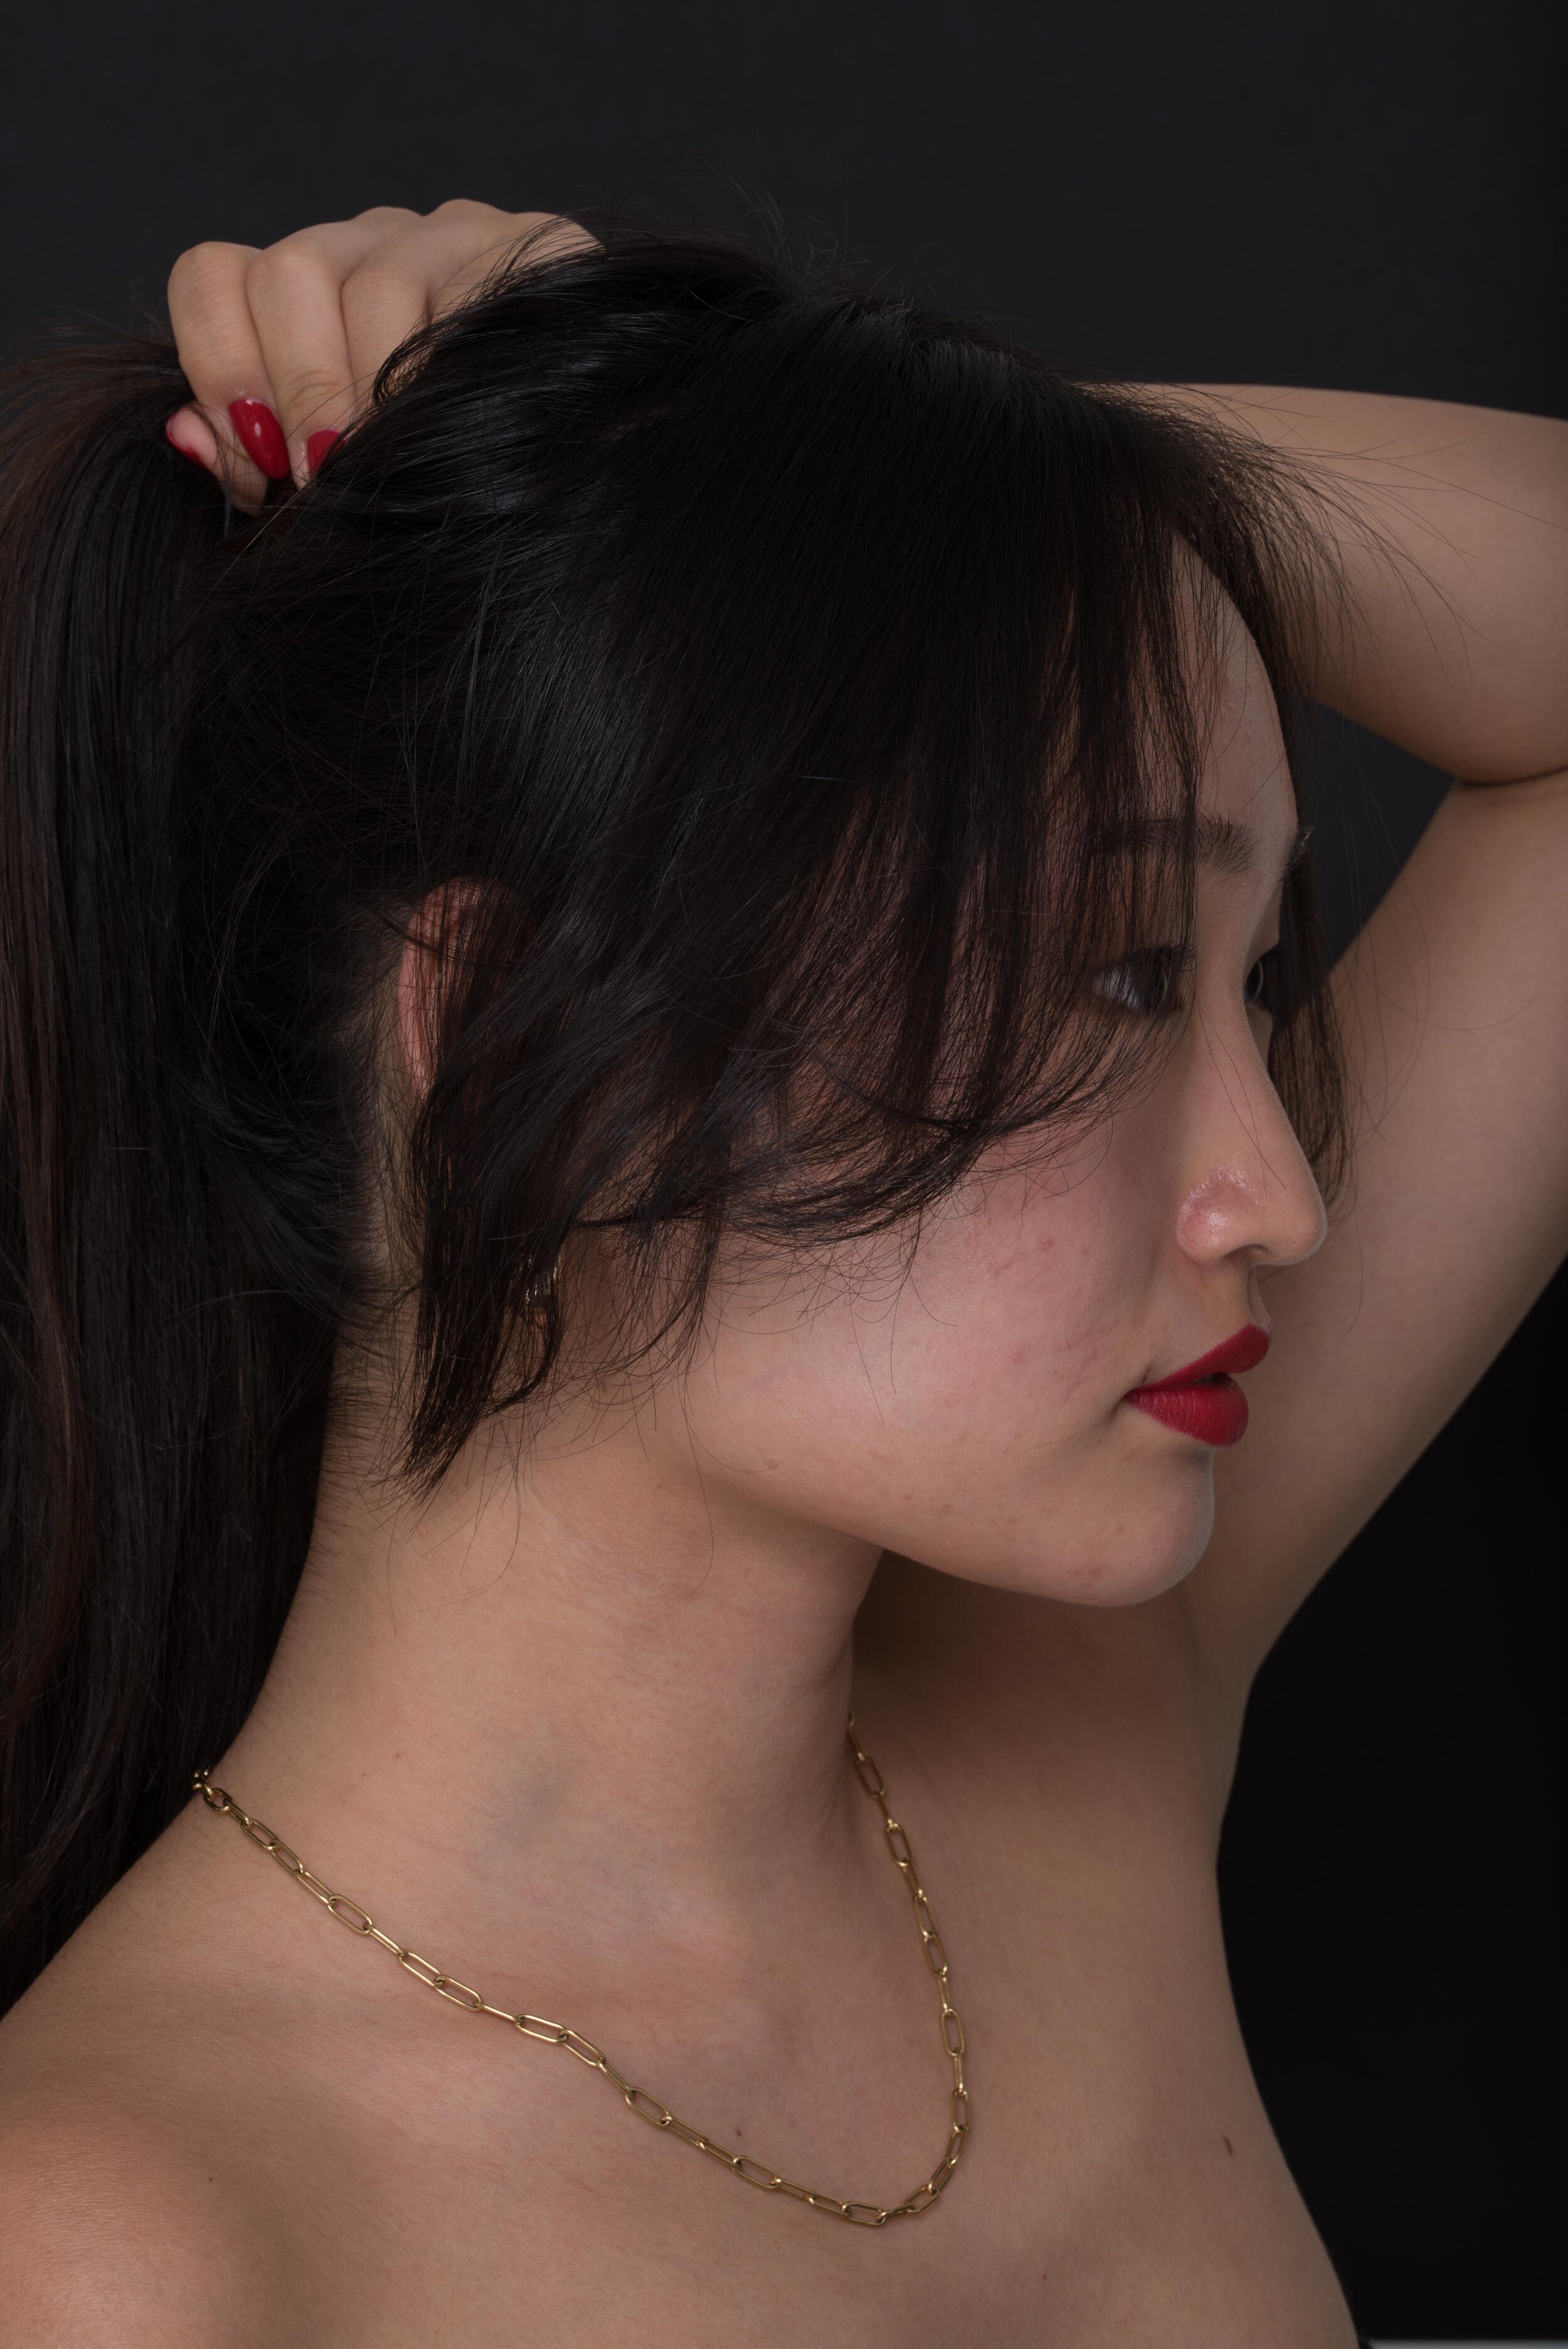
Like I said, I tend to underexpose my images slightly, because I think brightening a photo up looks more natural than darkening it. The settings I used for this photo were 1/200, f22, ISO 100 and my light was set to 9.5 (10 being the highest). I then took the image into Lightroom to correct light and colors. Retouching was done in Photoshop, which affects the tone of the skin and the highlights, since I always work on those elements with Dodge and Burn. Wanna learn more about this process?
My light is set to a very high setting, because I’m shooting at such a high f-stop. I use f22 to get allll the details and texture in my photo. That’s another tip, especially for beauty photography: Use a high f-stop to get as much detail as possible. If you’re shooting with f1.4 for example, you will never ever have skin texture showing evenly over the whole face. I know working with such a high f-stop can be scary, especially if you’re used to shooting at a low f-stop, but it’s most definitely worth it for this type of work!
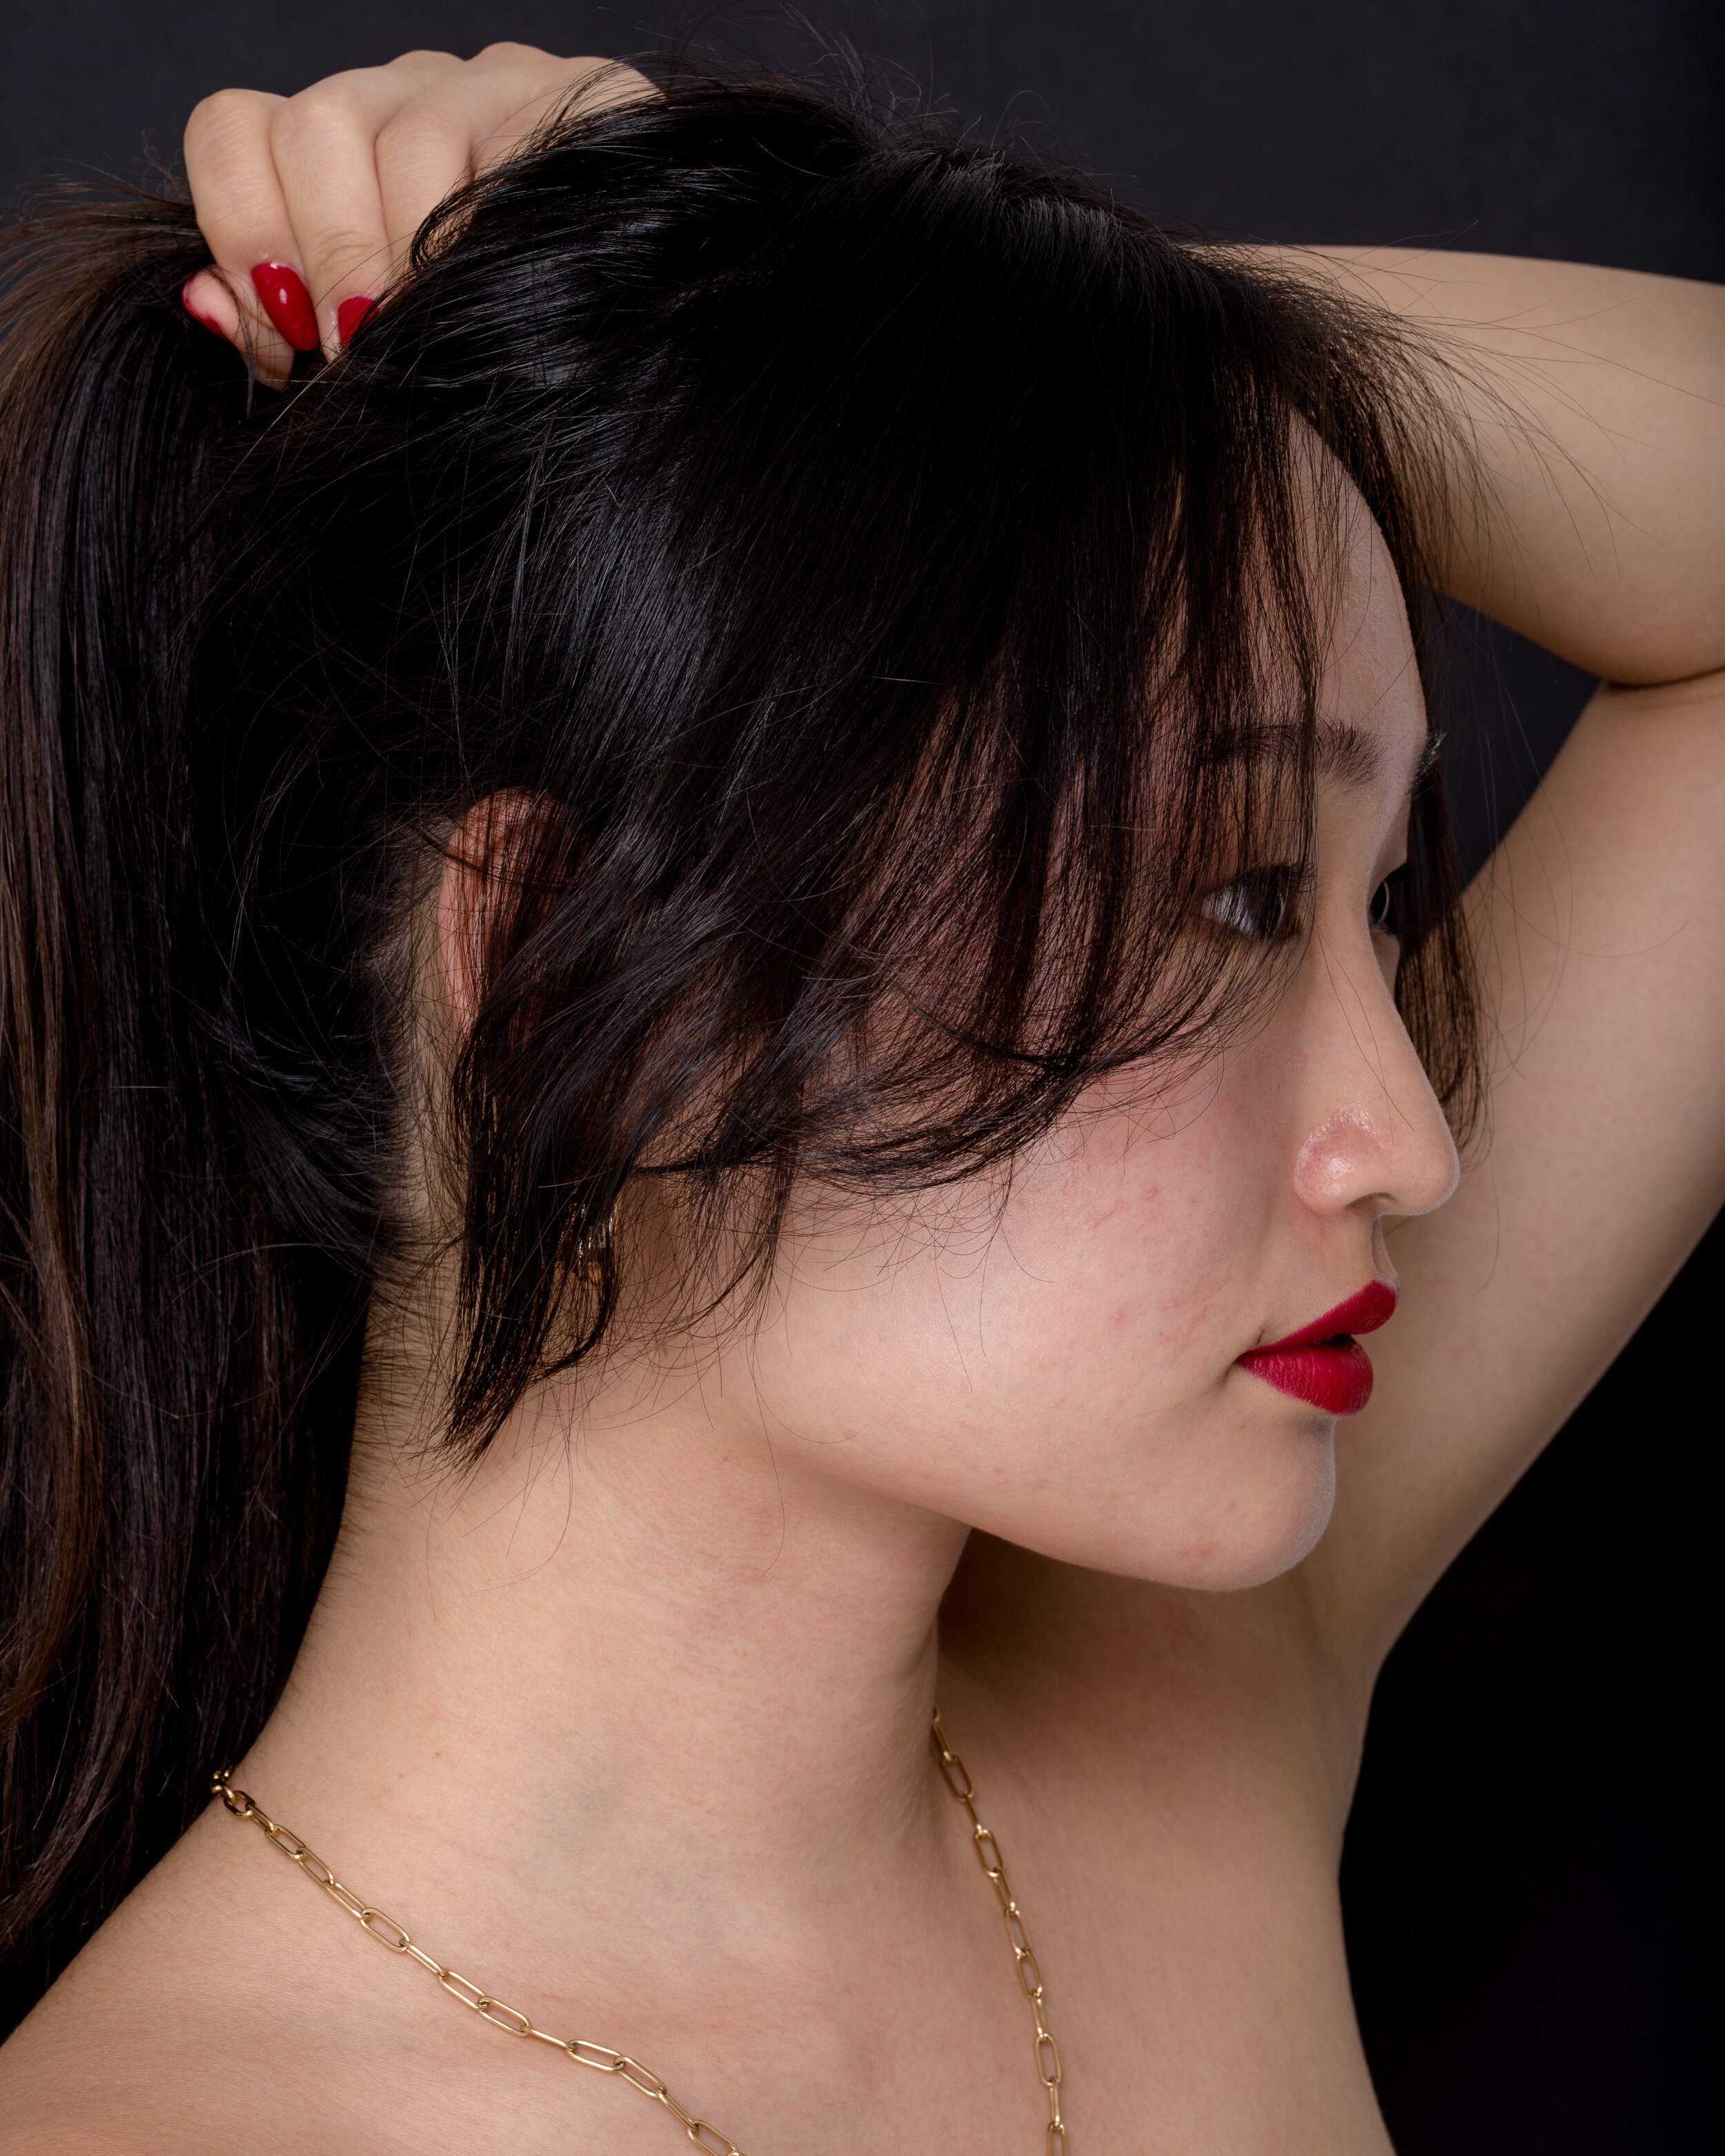
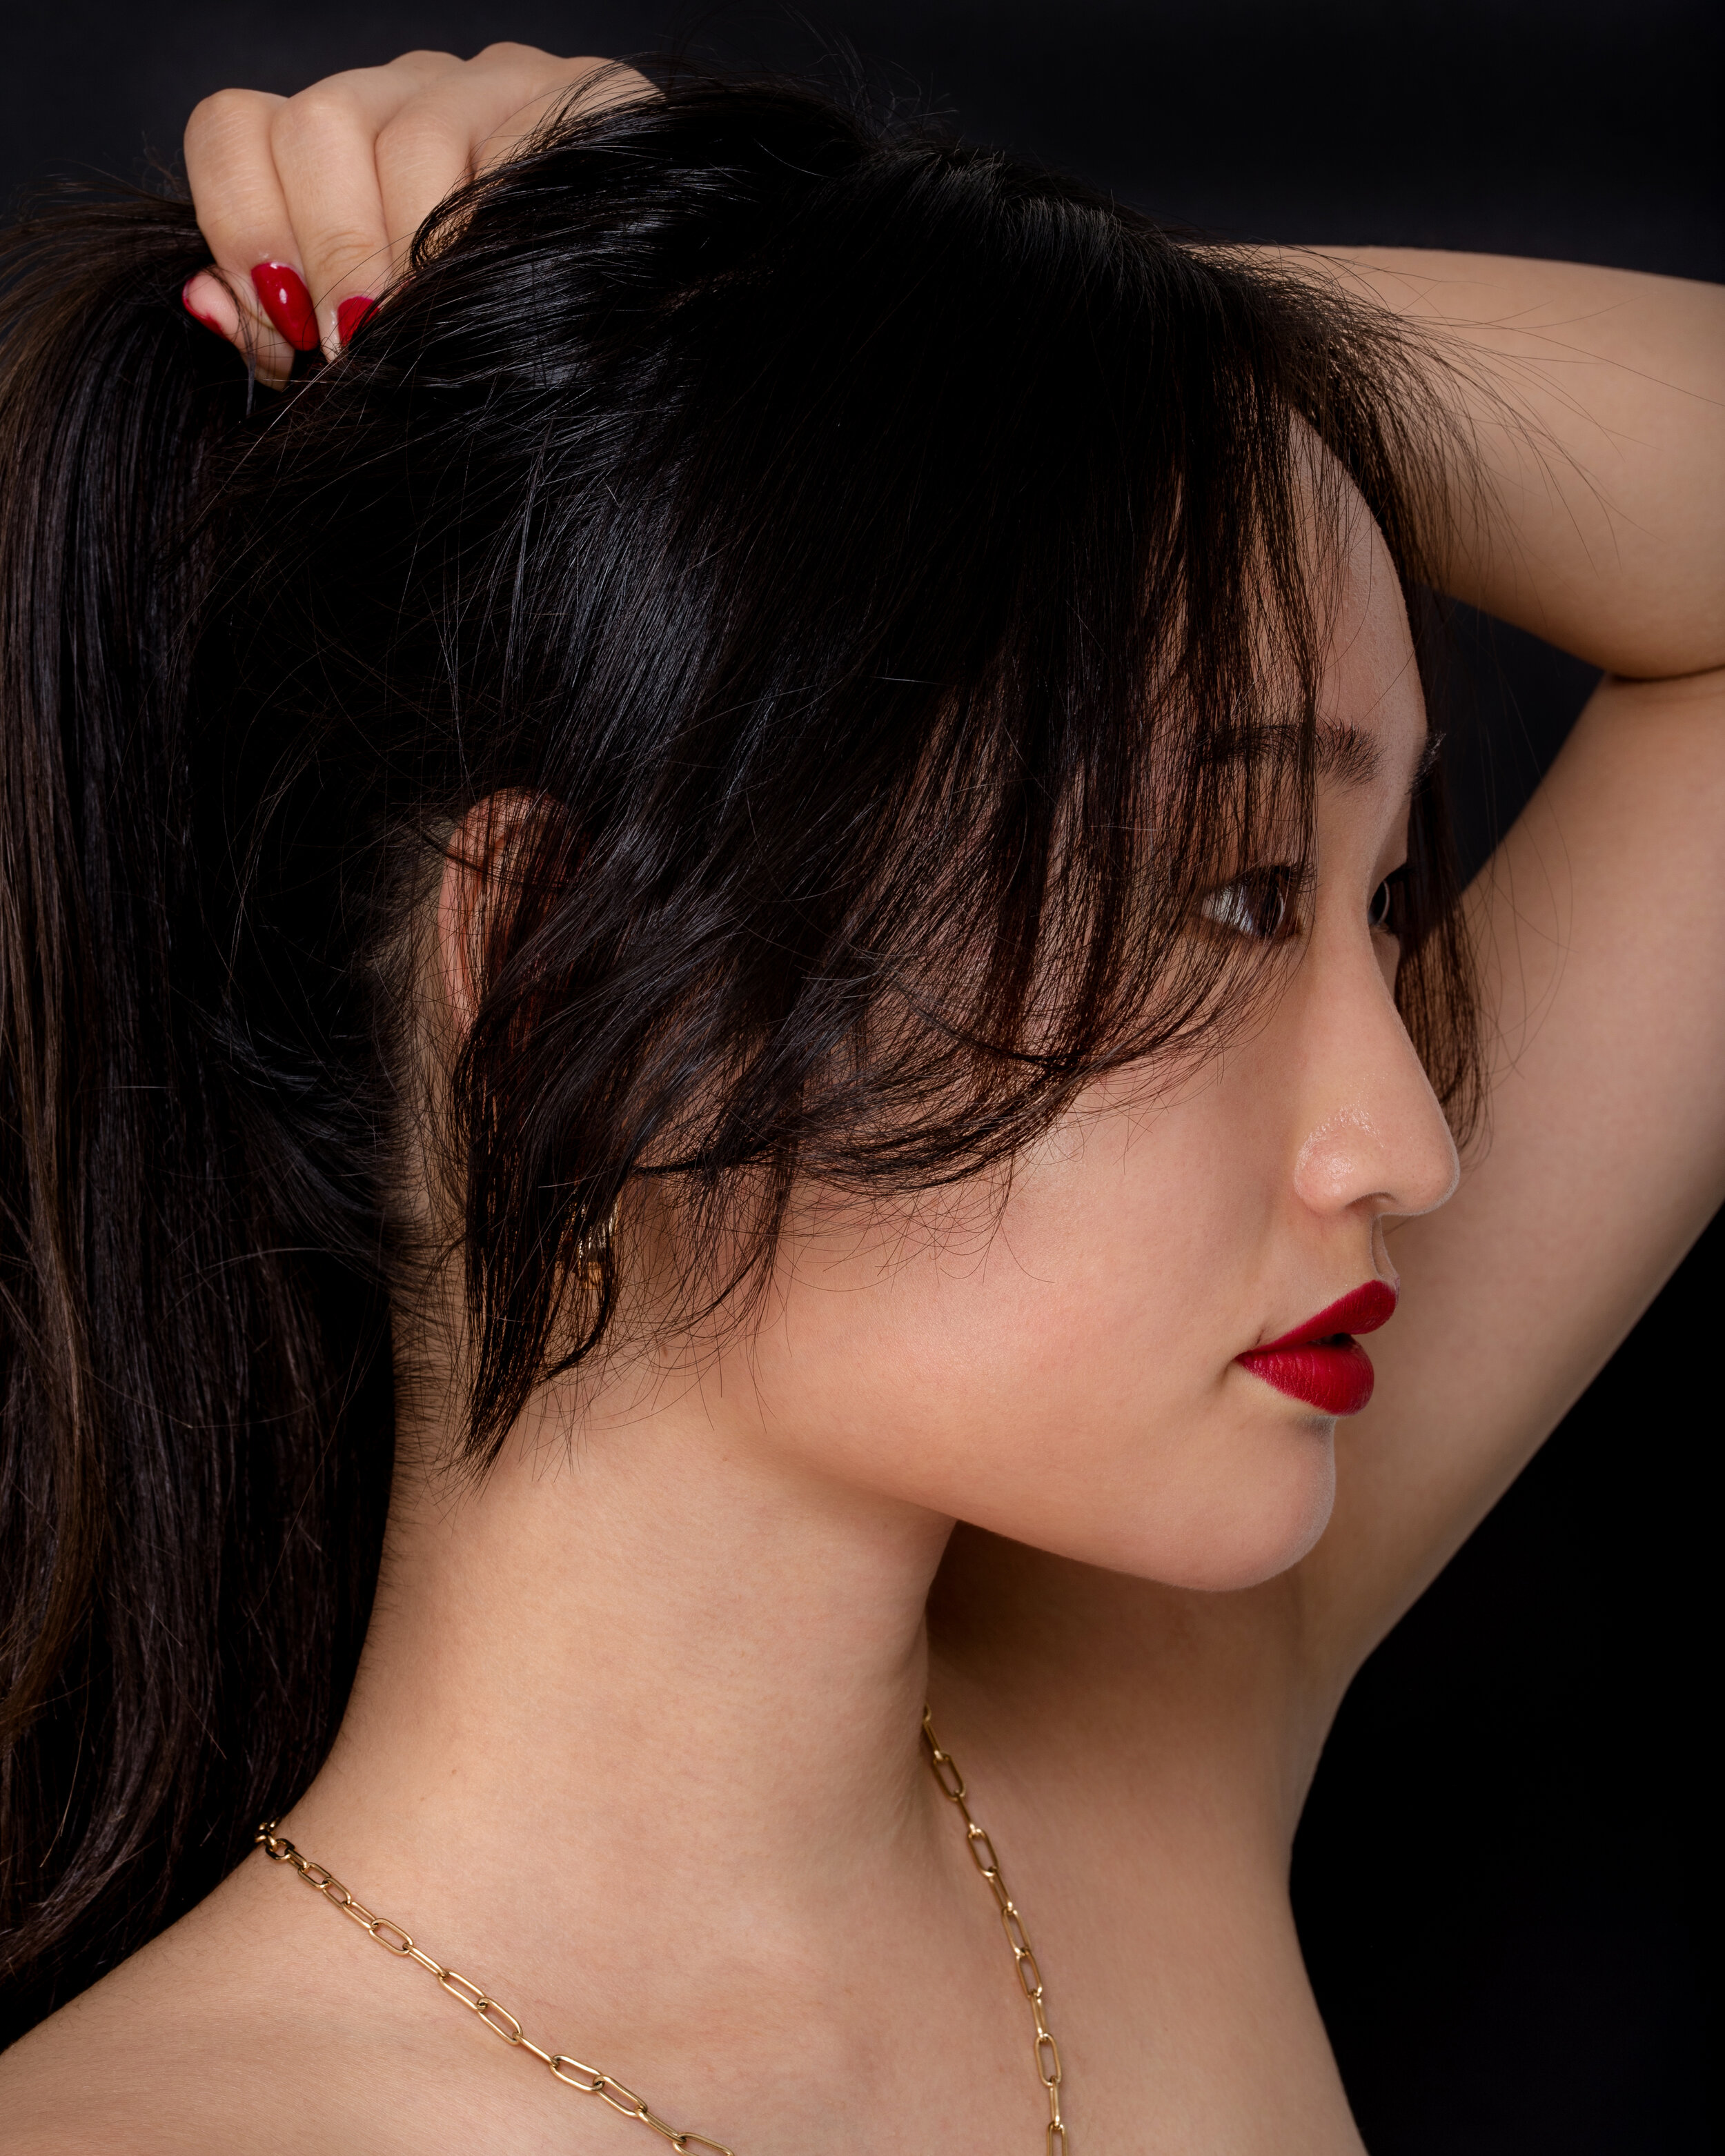
Below, you can see some photos with different exposures. I ended up going with the middle exposure, which were the same settings as above. The left one was a little too dark for me and the right one was too light.

To find the right exposure, I suggest taking a few test images at the beginning of your session. Don’t let anything stress you out during that process, focus and make sure everything is exactly how you want it to be.
And don’t forget about post processing! You can do a lot to a photo afterwards, and that impact shouldn’t be underrated. If you’re interested in the post processing process make sure to check out my Lightroom & Photoshop Masterclasses here!
If you want to see how we created the images in this post watch the Behind the Scenes video below!